Creating an image of a damaged disk
In this article, we will look at creating an image of a damaged disk, as well as restoring data using this image. This disk was used in an Asustor NAS in a RAID 0 configuration with another disk.
Important: The further steps described in this guide are performed at your own risk.
Creating an image of a damaged disk may cause it to completely fail.
If you are in doubt or the "health" of the disk in SMART is very low,
we recommend contacting specialists for physical disk repair.
So, to create a disk image, you need to install and run
ReclaiMe Pro,
because this program allows you to set more flexible parameters for working with a dying disk.
-
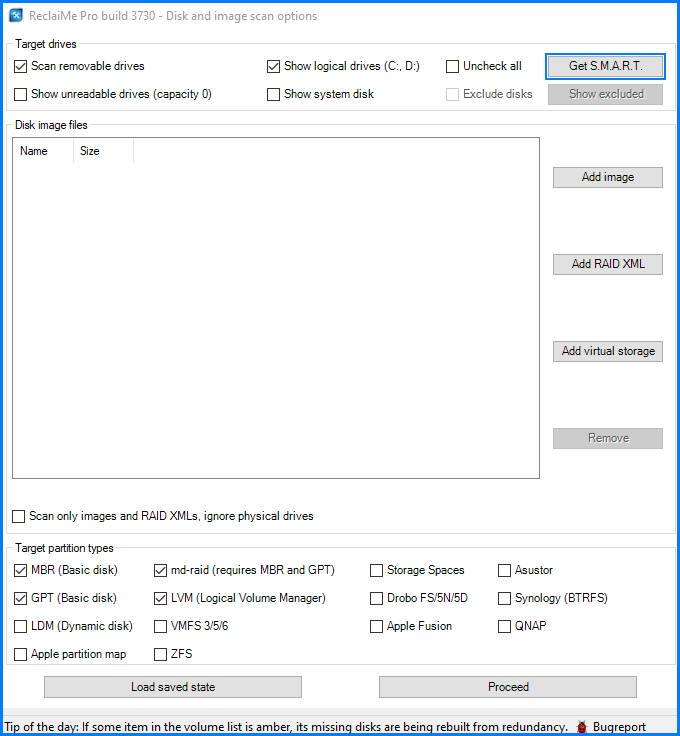
After installation, click on the Get SMART button and wait for the end of
collecting statistics of SMART diagnostic data for all disks connected to the computer.
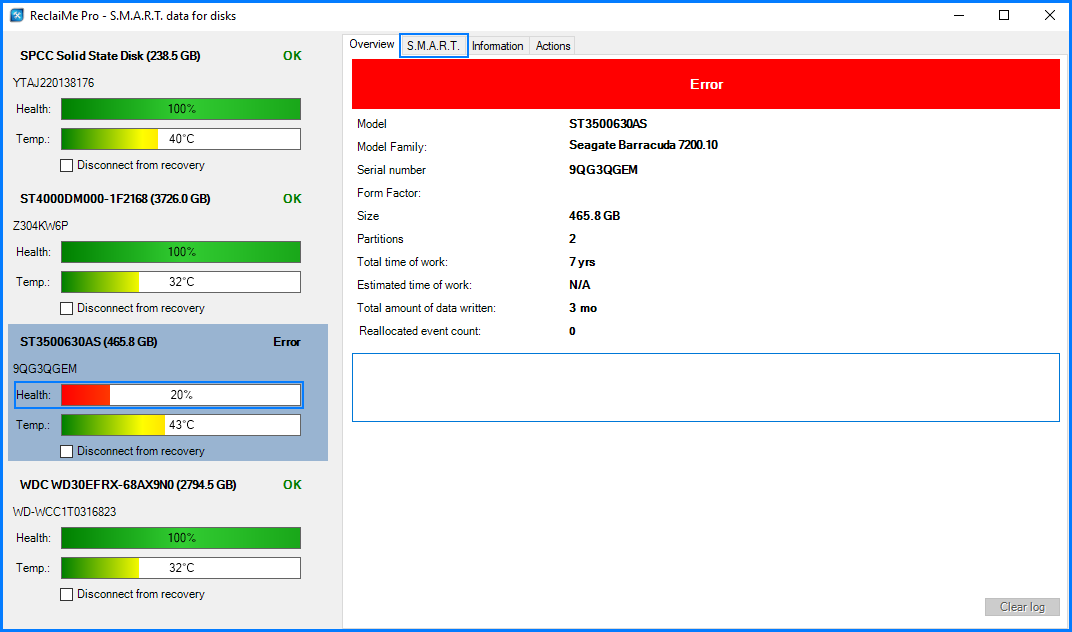
- As we can see, our disk has only 20% "health" left.
To see the detailed information, click on the SMART tab
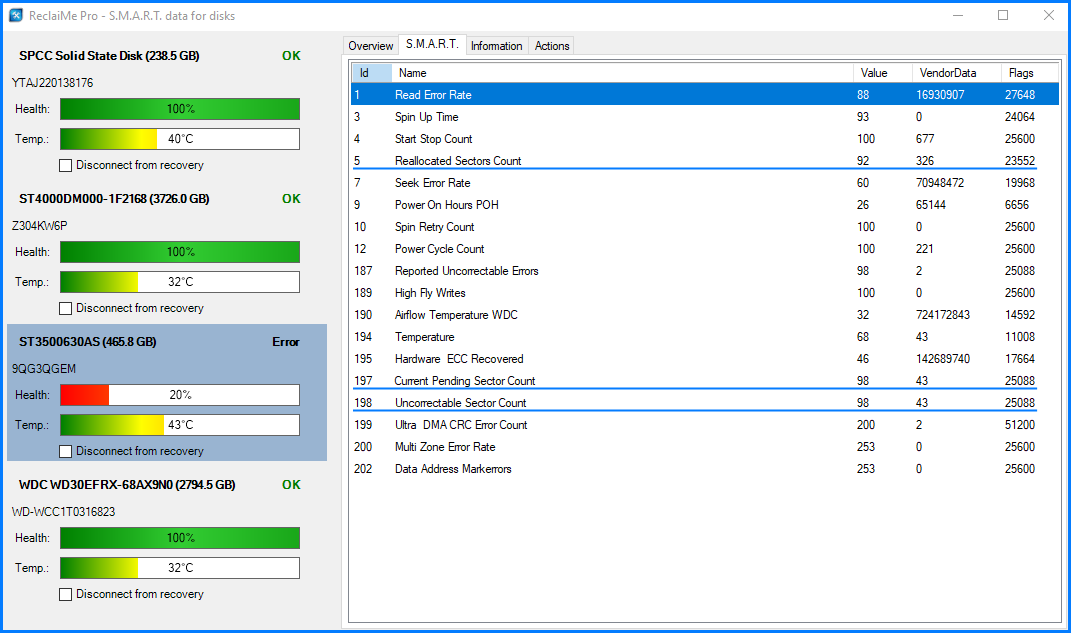
- This is the reason why the disk has 20% "health" left - Reallocated sectors count,
current pending sectors count and unallocated sectors count.
You can read more about these attributes on
this page.
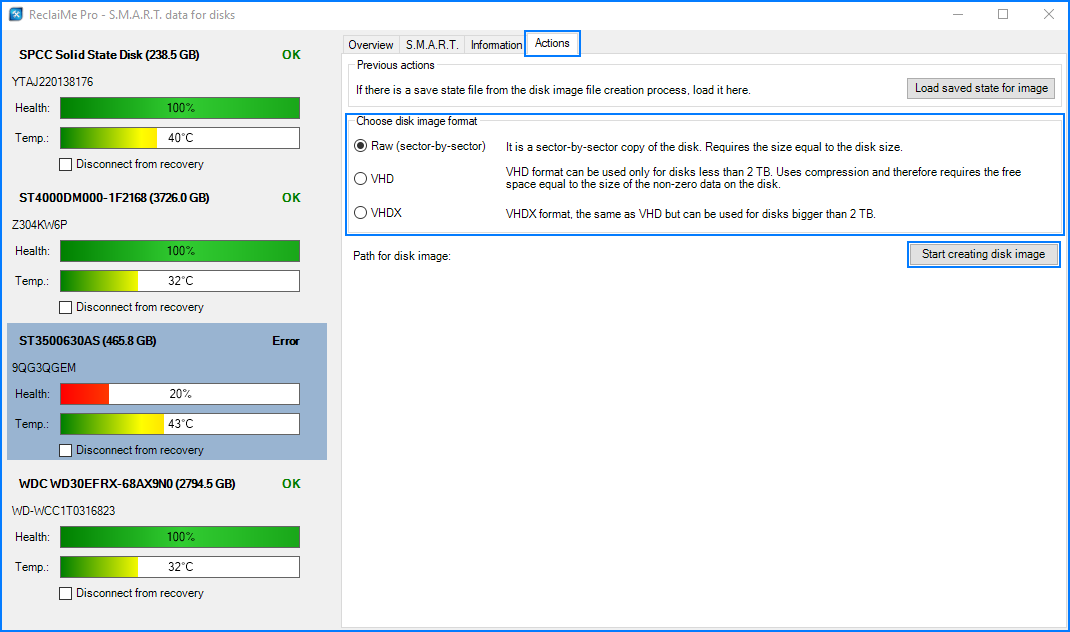
- To create an image, go to the Actions tab, select the image type and click
Start creating disk image.
We will use the default image type - RAW (sector-by-sector).
But in case you don't have free space to create a sector-by-sector image, you can use VHD or VHDX.
Also, during the image creation process, the disk will be automatically excluded from the candidates for data recovery so as not
to worsen its "health" with other reading processes.
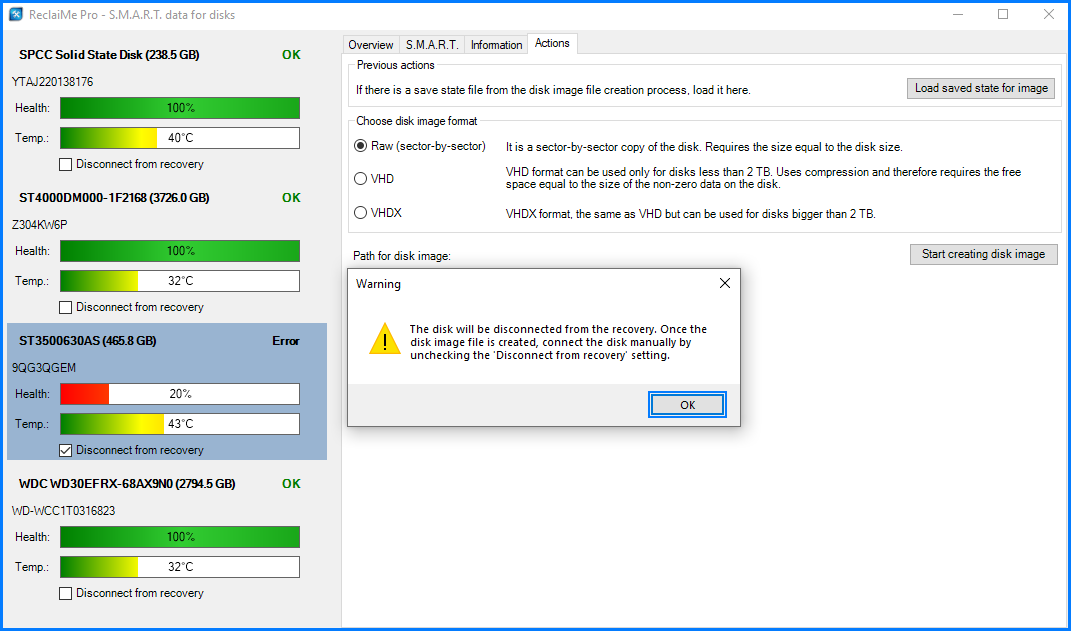
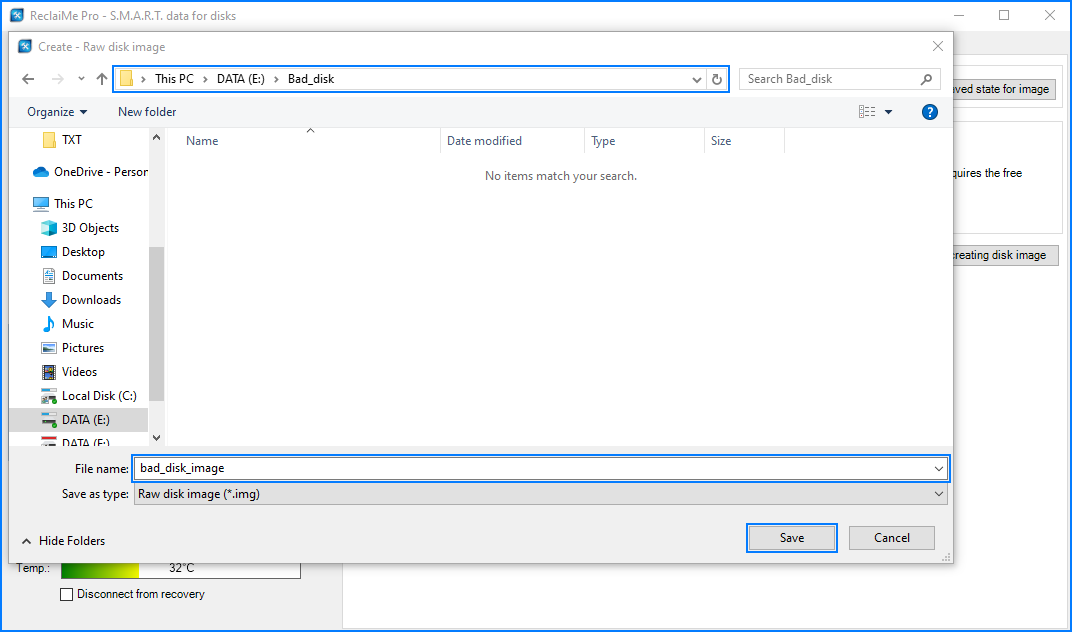
- You need to specify the path where the image will be saved and its name.
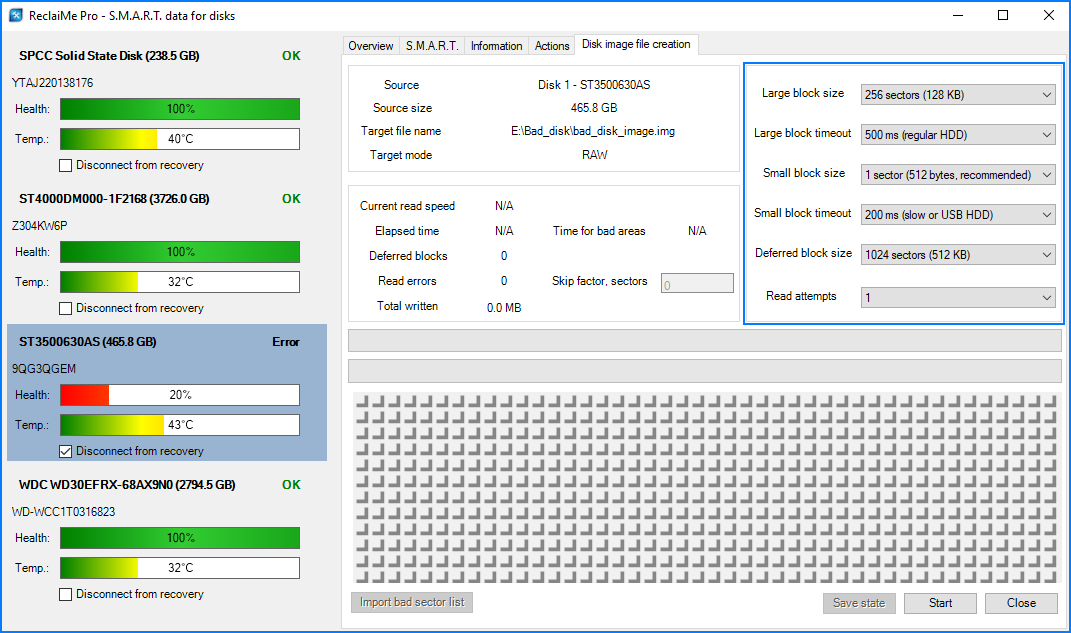
- Next, you need to set the parameters for the image creation process.
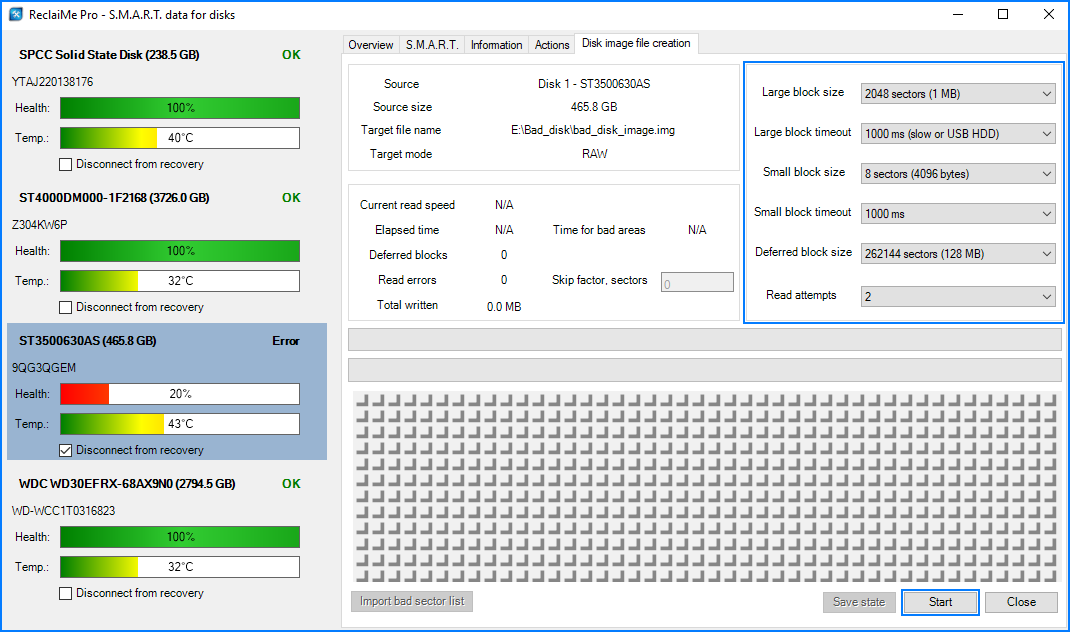
In our case, we have set the following parameters in order not to damage the disk even more,
as well as to speed up the process. To do this, we have set the maximum size for all blocks,
as well as the maximum timeout during which ReclaiMe Pro will try to read damaged sectors.
Once all the parameters are set, click on the Start button to start the image creation process.
- Green marks the blocks from which ReclaiMe Pro has successfully read the data.
The red ones are those blocks (large block size) that could not be read from,
but during the second reading attempt, ReclaiMe Pro will try to read data from them again,
in blocks whose size is set in small block size parameter.
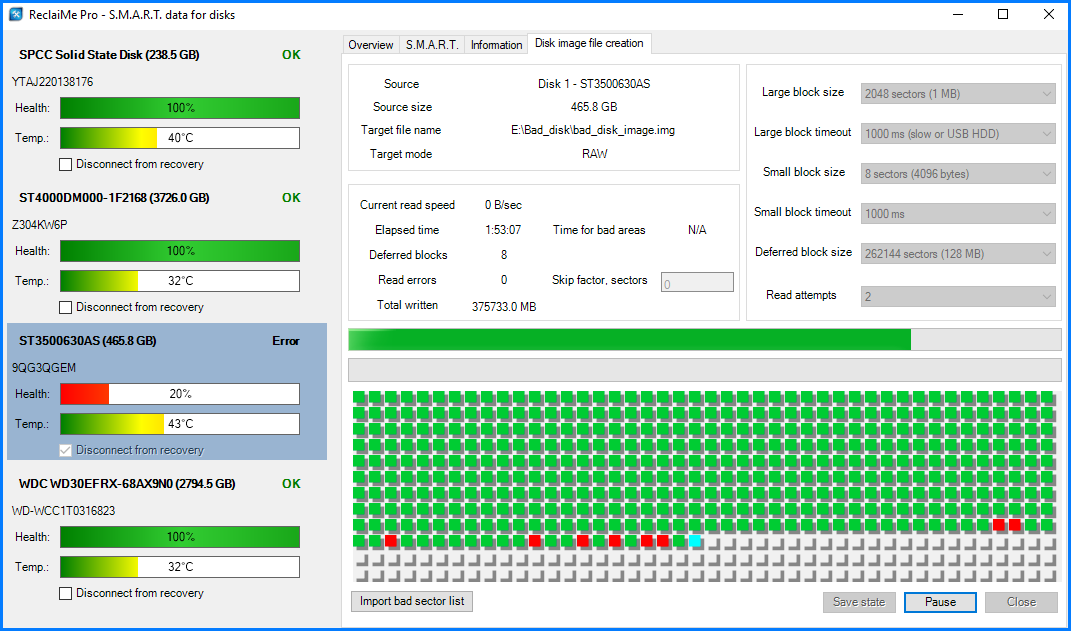
At the end of the process, you will see a message about the successful creation of the image.
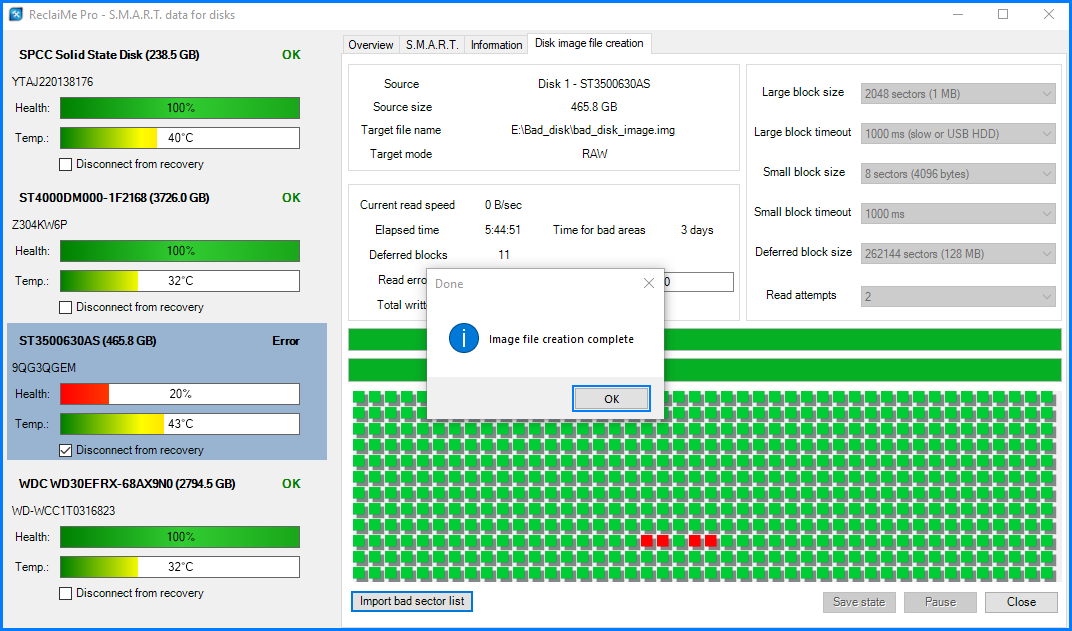
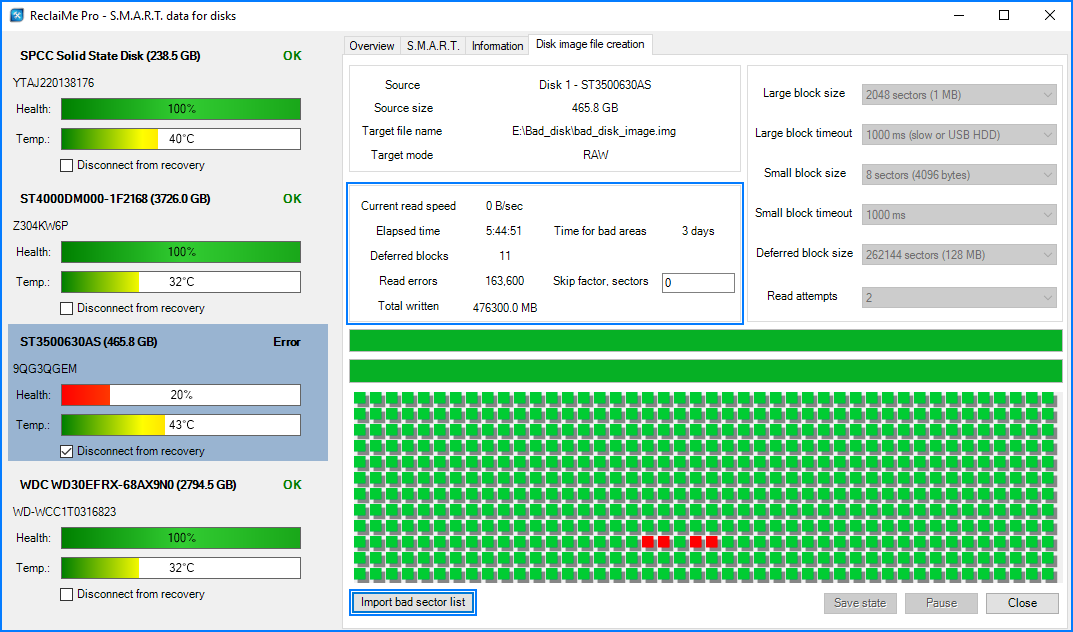
- As we can see from the final statistics, 11 blocks of 128 MB were deferred (that is, we lost about 1.5 GB of data in the process),
as well as that there were more than 160,000 read errors.
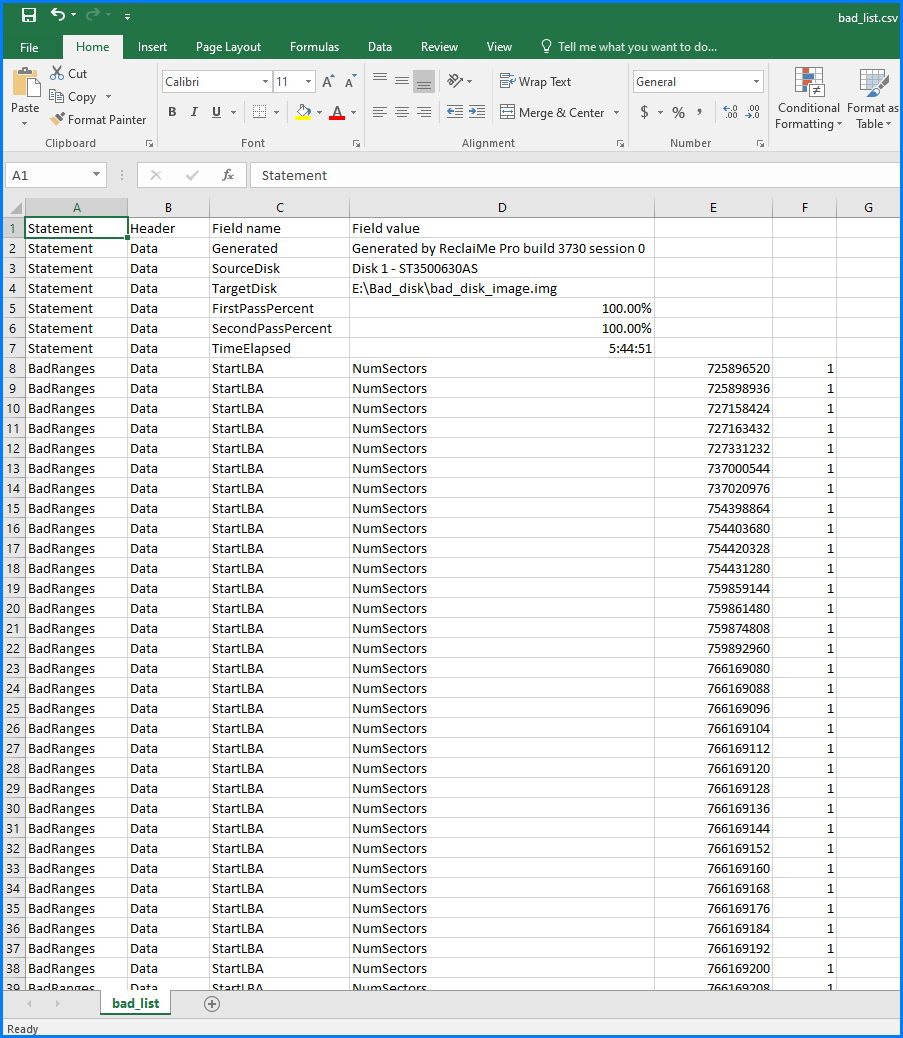
Also, at the end of the process, you can find out the list of damaged sectors - just click
on the Import bad sector list button and save the .csv file.
After opening this file, we will see a list of all the corrupted sectors.
- Next, close the SMART window in Reclaime Pro. We also see a huge number of reading errors in the main window.
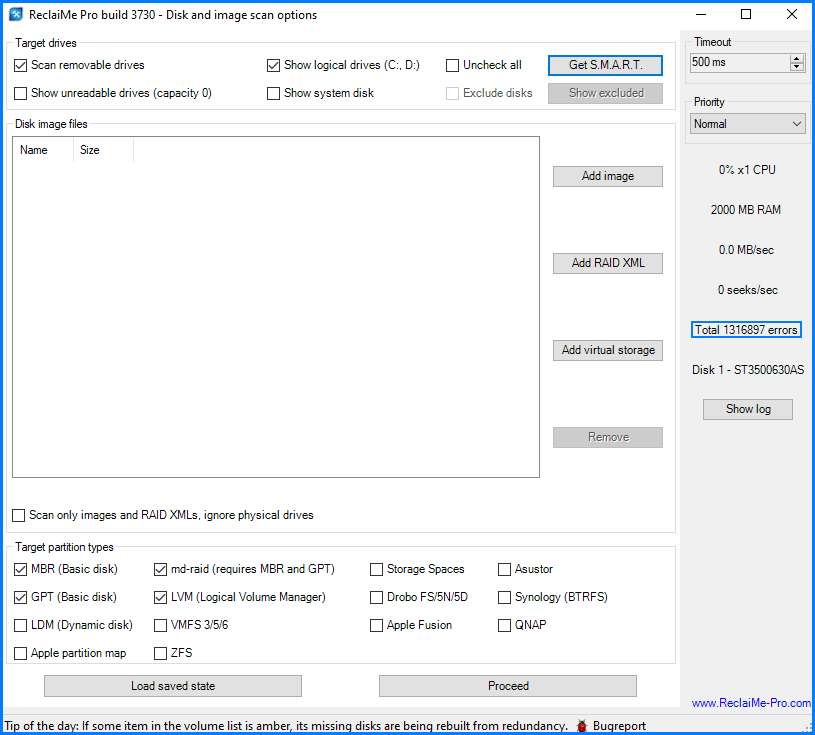
- Before further actions, it is better to disconnect the damaged disk so as not to accidentally damage it even more.
After that, restart ReclaiMe Pro and load the created image.
In this case, since the disk is from NAS Asustor, we selected the following parameters:
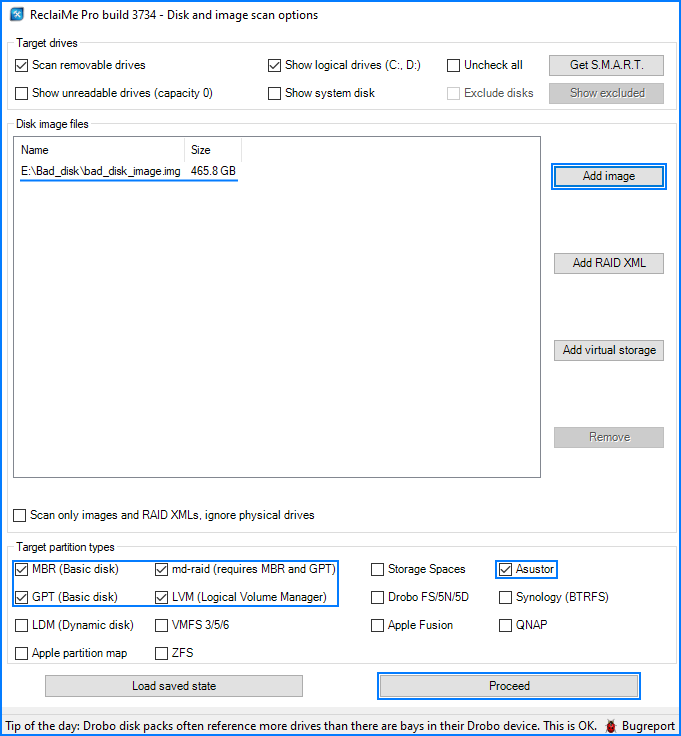
- After scanning the disks, we get to a window with disks and partitions.
Here we see both a healthy second disk from Asustor and the created image.
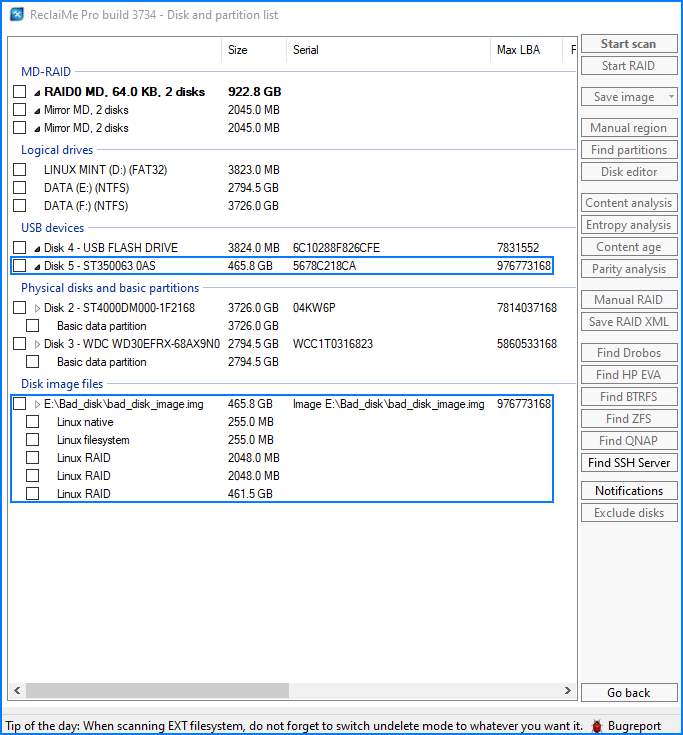
As we can see, the MD RAID 0 partition from Asustor has been successfully identified.
Select it and start the scan by clicking on the Start scan button
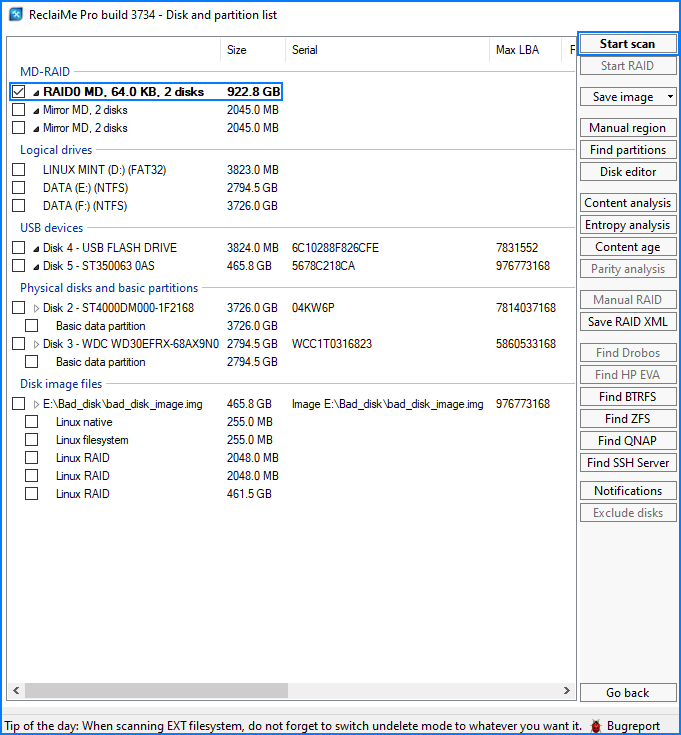
- Select the file system - in our case, it is EXT and click Start
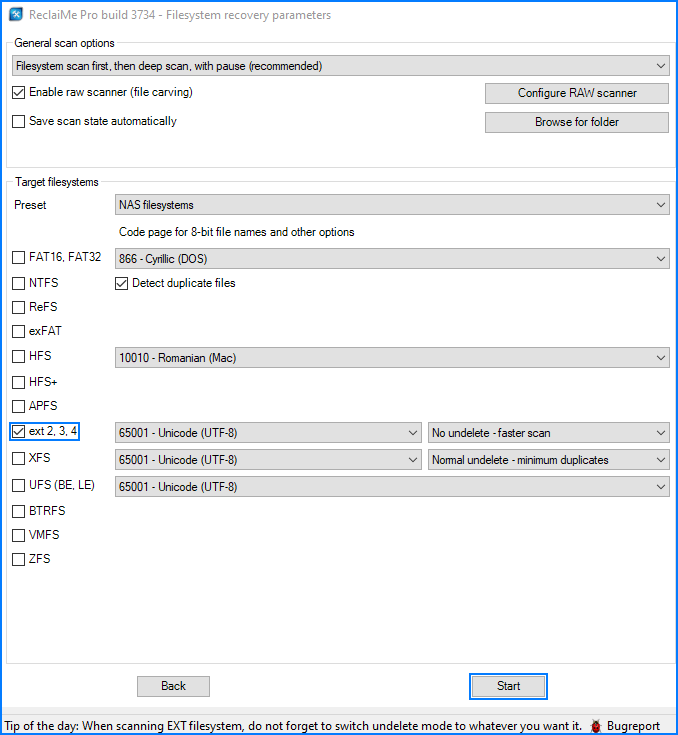
In the pop-up window, you can select automatic saving of saved state files.
We recommend using this option, because in case of a power failure or any other problems,
you will be able to use these files to continue scanning, rather than starting all over again
- Next, wait for the window informing about the completion of the initial scan.
Typically, by this point ReclaiMe Pro has already found most of the files.
But in case of severe damage to the partition or a large number of deleted files, you can continue the scan.
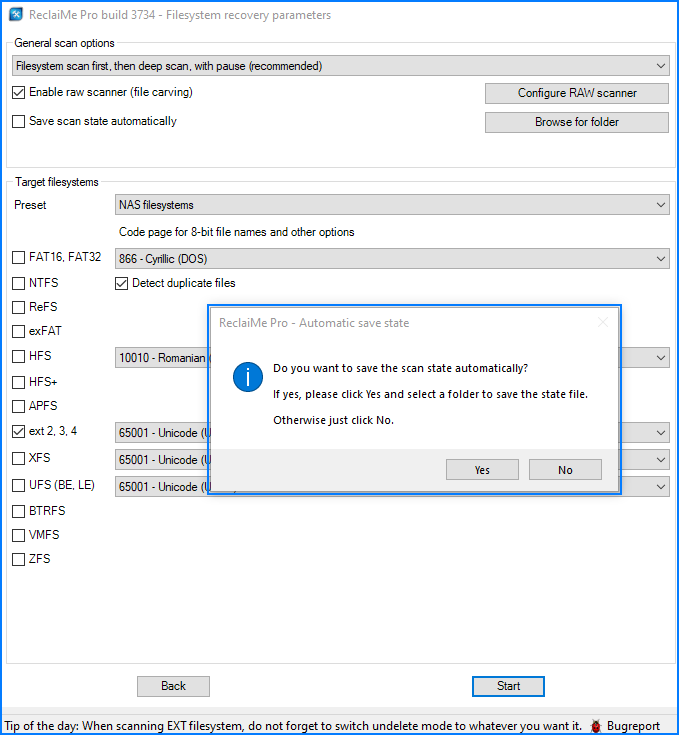
Click OK and check the quality of the recovery. Select any file and open it in the Preview.
You can use this option to view photos, documents, videos, etc. As we can see, everything is fine with this file.
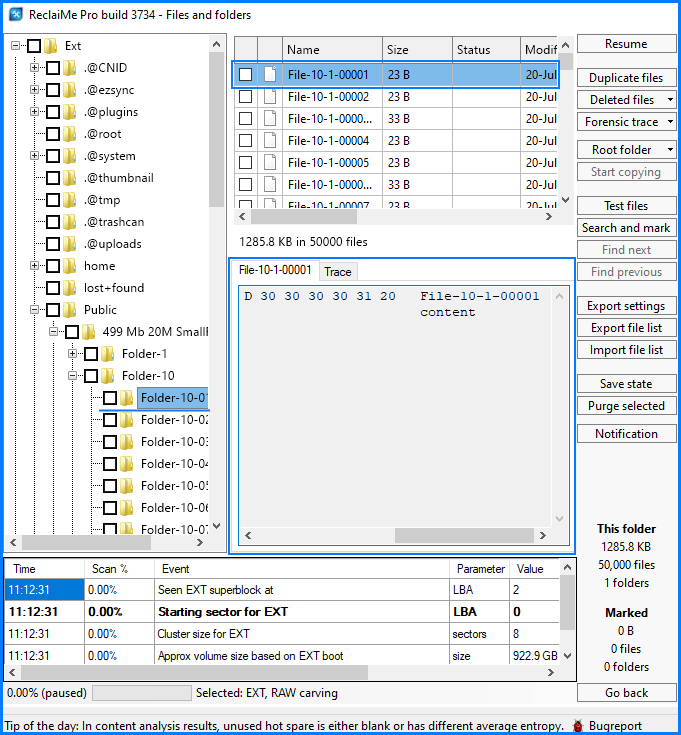
After that, it is enough to select all the necessary files and start copying using the Start copying button.